'Loading' Christmas Card
| 첨부 '7' |
|---|

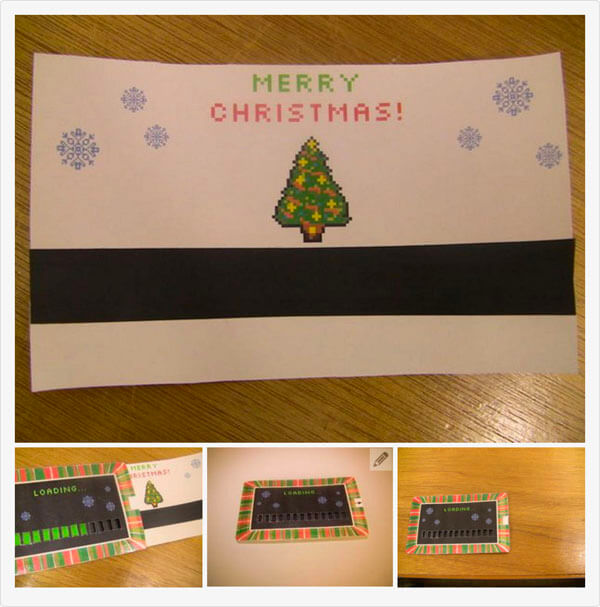
This is a cool and festive "Retro Loading Screen" christmas card. It features 8-bit clip art and a retro computer font. This a perfect Christmas card for any techie.
Step 1: Supplies
Here is a list of what you will need:
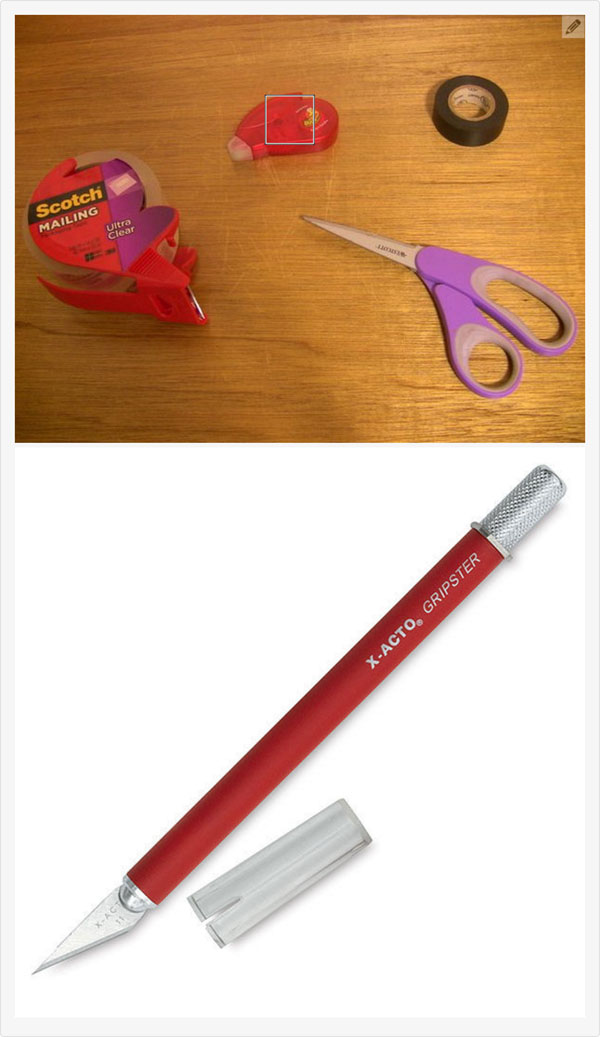
Packing tape
Black tape
X-ACTO knife
Scissors
Stiff white paper
A printer
OPTIONAL: Adhesive roller
Step 2: Printing and Cutting

First you will need to load your stiff paper into your printer. Once that is done, you will need to print the 3-page-PDF in this step AFTER SCALING IT DOWN TO 75%. It is VERY IMPORTANT that you do this. Most computers/laptops have a percentage scale in their print window. BE SURE THE SCALE IS SET TO 75%. After the 3 pages have printed, you will take the first one and an X-ACTO knife and begin cutting out the white rectangles in the middle of the card.
Step 3: More Cutting
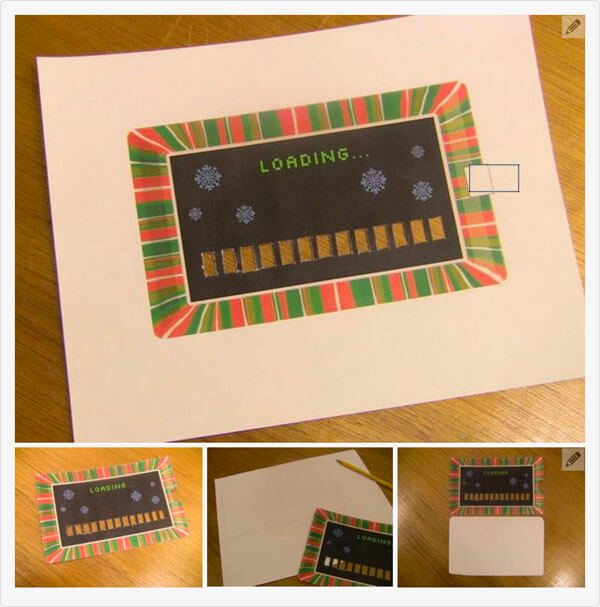
Next, you will cut around the card's border; cutting the card out. (You don't need the X-ACTO knife for this.) Be sure to cut out the little white square on the right. Then, on a blank sheet of paper you will trace the part of the card you just cut out. (It does not matter if you trace the square indent on the right or not. Either way you will eventually have to cut out a little square there anyway.) Now simply cut out the shape you made with your pencil. It should be the same size as the part of the card you printed.
Step 4: Assembling the Card
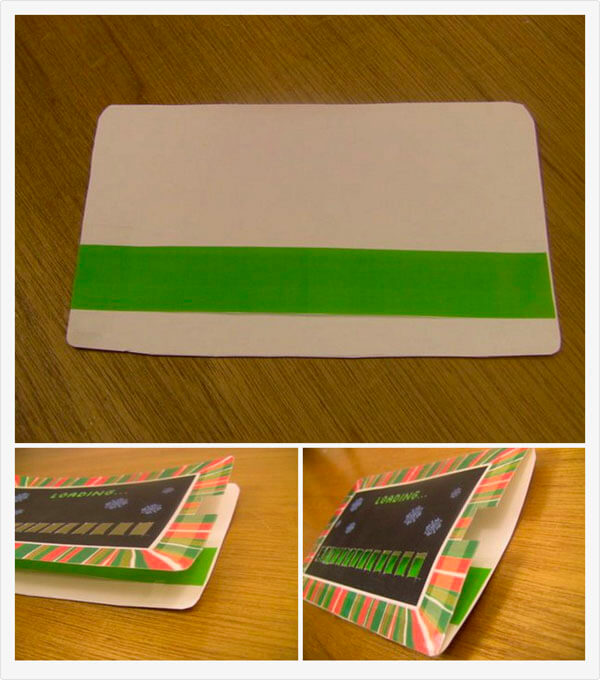
Now what you need to do is cut the green rectangle out of the paper it was in. Once you have the green rectangle you can use the adhesive roller (or a glue stick or regular tape) to stick it on the piece you cut out from the last step. It should be a little bit above the bottom of the paper. Look at the picture for a more accurate placement of the green rectangle.
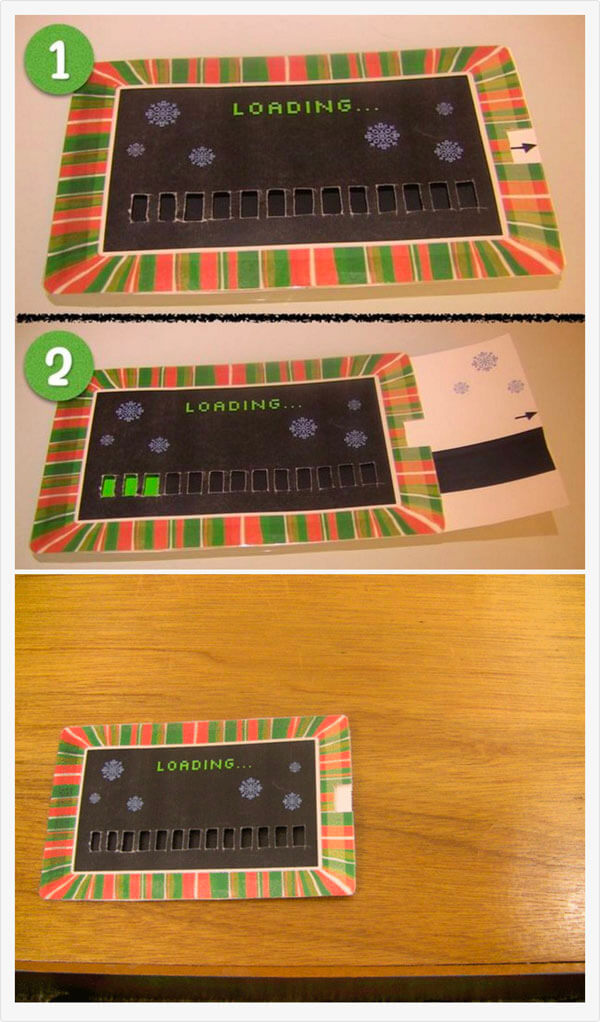
To combine the two pieces (the one that says "loading" and the one with the green bar), you will need to first place them directly on top of each other (the "loading" one should be on top). Next, you will put a strand of tape one one edge of the card leaving half to hang off, then fold the half that is hanging off to the back of the card. Basically what you are doing is sticking them together from the outside. Do this to all of the edges except the right edge.
Step 5: Finishing
[출처] http://www.instructables.com/id/Loading-Christmas-Card/
| 번호 | 분류 | 제목 | 글쓴이 | 날짜 | 조회 수 |
|---|---|---|---|---|---|
| 301 | FreeTalk |
한국의 개발자는 쓸데없이 바쁘다
|
hooni | 2014.10.14 | 553 |
| 300 | FreeTalk |
리더에게 사랑받는 주니어의 특징
|
hooni | 2014.10.14 | 646 |
| 299 | FreeTalk |
30대 남자가 여자에게 매달리지 않는 이유
|
hooni | 2014.10.14 | 4284 |
| 298 | FreeTalk |
한국의 선입견
|
hooni | 2014.10.13 | 490 |
| 297 | FreeTalk |
기본 과학 지식 Quiz
|
hooni | 2014.10.13 | 435 |
| 296 | FreeTalk |
자동으로 눈이 녹고 주차선이 그려지는 태양광 도로, 22억 크라우드 펀딩 성공
|
hooni | 2014.10.13 | 826 |
| 295 | FreeTalk |
사기꾼 부부의 결말
|
hooni | 2014.10.11 | 713 |
| 294 | FreeTalk |
천조국의 가정교육
|
hooni | 2014.10.10 | 587 |
| 293 | FreeTalk |
무신론자들의 명언
|
hooni | 2014.10.10 | 446 |
| 292 | FreeTalk |
첫경험 충격으로 훈남된 남자
|
hooni | 2014.10.10 | 1384 |
| 291 | FreeTalk |
우유의 불편한 진실
|
hooni | 2014.10.10 | 637 |
| 290 | FreeTalk |
과자 과대포장이라니, 오해입니다?
|
hooni | 2014.10.10 | 503 |