How to Install and Use wget on Mac
| 첨부 '4' |
|
|---|

wget is a non-interactive command-line utility for download resources from a specified URL. Because it is non-interactive, wget can work in the background or before the user even logs in. The program was designed especially for poor connections, making it especially robust in otherwise flaky conditions. While wget isn’t shipped with macOS, it can be easily downloaded and installed with Homebrew, the best Mac package manager available.
1. Download and Install Homebrew

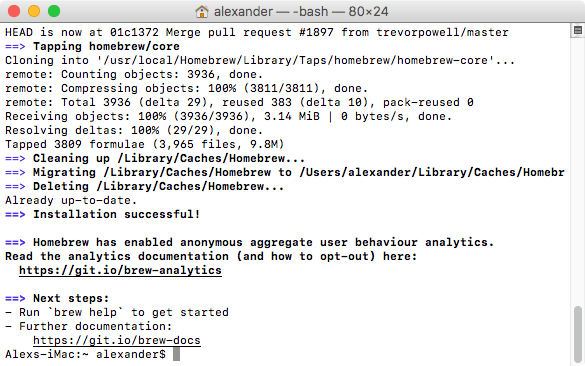
To install Homebrew, open a Terminal window and execute the following command taken from Homebrew’s website:
Install Homebrew
mac:~ hooni$ /usr/bin/ruby -e "$(curl -fsSL https://raw.githubusercontent.com/Homebrew/install/master/install)"
mac:~ hooni$ brew update
mac:~ hooni$ brew doctor
You might notice the command called curl, which is a different command-line utility for downloading files from a URL that ships within the Ruby installation included on macOS.
2. Installing wget
Once it has completed installing itself, we will use Homebrew to install wget. In Terminal, run the following command to download and install wget:
Install wget
mac:~ hooni$ brew install wgetYou’ll get live updates on the progress of downloading and installing whatever dependencies (software prerequisites) are required to run wget on your system.
If you already have Homebrew installed, be sure to run brew update to get the latest copies of all your formulae.
3. Using wget

The purpose of wget is downloading content from URLs. It’s a quick and simple non-interactive tool for downloading files from any publicly accessible URL.
Download a single file
Like the similar command curl, wget takes a remote resource from a URL and saves it to a specified location on your computer. The command’s structure works like so:
mac:~ hooni$ wget -O path/to/local.copy http://example.com/url/to/download.htmlThat will save the file specified in the URL to the location specified on your machine. If the -O flag is excluded, the specified URL will be downloaded to the present working directory.
Download a directory recursively
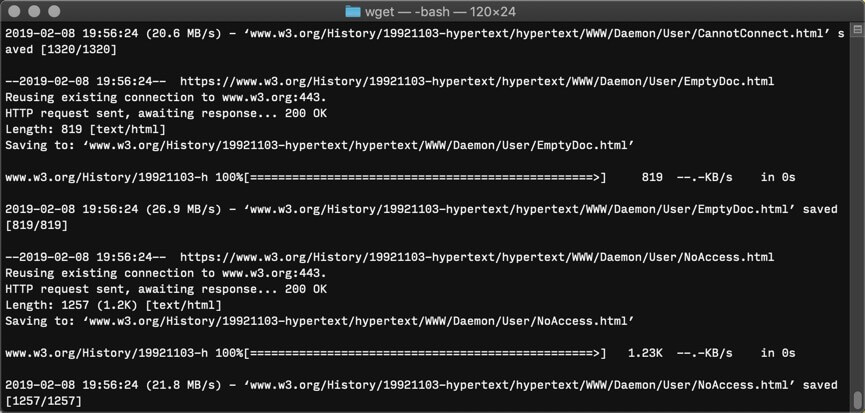
To download an entire directory tree with wget, you need to use the -r/--recursive and -np/--no-parent flags, like so:
mac:~ hooni$ wget -e robots=off -r -np https://www.w3.org/History/19921103-hypertext/hypertext/This will cause wget to follow any links found on the documents within the specified directory, recursively downloading the entire specified URL path.
That command also includes -e robots=off, which ignores restrictions in the robots.txt file. In general, it’s a good idea to disable robots.txt to prevent abridged downloads.
Other wget Flags
In addition to the flags above, this selected handful of wget’s flags are the most useful:
Controlling the download
wget -X /absolute/path/to/directorywill exclude a specific directory on the remote server.wget -nHremoves the hostname directories. Remember, the hostname is the part of the URL that contains the domain name and ends in a TLD like “.com.” For example, the folder named “www.w3.org” in our previous example would be skipped, starting the download with the “History” directory instead.wget --cut-dirs=#skips the specified number of directories down the URL before starting to download files. For example,-nH --cut-dirs=1would change the specified path of “ftp.xemacs.org/pub/xemacs/” into simply “/xemacs/,” reducing the number of empty parent directories in the local download.wget -R index.html/wget --reject index.htmlwill skip any files matching the specified file name. In this case it will exclude all the index files. The * character can be used as a wildcard, like “*.png,” which would skip all files with the PNG extension.wget -i filespecifies target URLs from an input file. The input file must be an HTML file or be parsed as HTML with the additional flag--force-htmlwget -nc/wget --no-clobberwill not overwrite files that already exist in the destination.wget -c/wget --continuewill continue downloads of partially downloaded files.wget -t 10will try to download the resource up to 10 times before failing.
Adjusting the level of logging
wget -denables debugging output.wget -o path/to/log.txtenables logging output to the specified directory instead of displaying the log-in standard output.wget -qturns off all of wget’s output, including error messages.wget -vexplicitly enables wget’s default of verbose output.wget --no-verboseturns off log messages but displays error messages.
Conclusion
While that should cover the majority of wget use cases, the downloader is capable of much more. For a full description of wget’s capabilities, you can review wget’s GNU man page online.
[출처] https://www.maketecheasier.com/install-wget-mac/
| 번호 | 분류 | 제목 | 글쓴이 | 날짜 | 조회 수 |
|---|---|---|---|---|---|
| 202 | System/OS | Apache CORS 설정 1 | hooni | 2020.09.04 | 2687 |
| 201 | System/OS | asx미디어 정보 기록.. | hooni | 2003.04.23 | 20533 |
| 200 | System/OS |
CentOS 6.5 USB 설치
6 |
hooni | 2013.12.18 | 37668 |
| 199 | System/OS | CentOS 에서 Cacti 설치하기 | hooni | 2015.01.02 | 1752 |
| 198 | System/OS |
Configure Postfix to Use Gmail SMTP on Ubuntu 18.04
|
hooni | 2020.02.07 | 1228 |
| 197 | System/OS |
Enable Safari Hidden Debug Menu in Mac OS X
|
hooni | 2017.02.07 | 1128 |
| 196 | System/OS |
Enable the Develop Menu in Safari
|
hooni | 2017.02.07 | 1056 |
| » | System/OS |
How to Install and Use wget on Mac
|
hooni | 2020.09.03 | 1257 |
| 194 | System/OS | How to Setup an Email Server on CentOS 7 | hooni | 2018.04.05 | 2767 |
| 193 | System/OS | HTTP 프로토콜 (브라우저와 웹서버 간의 통신) | hooni | 2003.04.23 | 48247 |
| 192 | System/OS |
HTTPS와 SSL 인증서
|
hooni | 2014.03.11 | 7541 |
| 191 | System/OS |
iptime 공유기 해킹 기술문서
4 |
hooni | 2015.01.01 | 1937 |
 Enable the Develop Menu in Safari